Do you want to do home automation on a dime? Sure we all do! So instead of paying $40-50 per outlet, how about $10-15 (or less!)? Here’s what you’ll need:
- ESP8266 module = http://goo.gl/eXgLSy = Ebay $1.92 with free shipping.
- 5V – AC Relay Switch = http://goo.gl/tQ1Q8F = Ebay $3.75 free shipping.
- 3.3v/5v Breadboard Power Supply = http://goo.gl/XlqIyq = Ebay $0.99 + $2.80 shipping ($3.79).
To program the code onto the ESP8266 you’ll need:
- 3.3/5v USB FTDI adapter = http://goo.gl/uVsbdQ = Ebay $2.11 free shipping.
- Mini USB cable = http://goo.gl/4kXnnq = Ebay $0.68 free shipping.
- Assorted Jumper cables = http://goo.gl/Uovo1G = Ebay $5.49 free shipping.
Follow these instructions to load the WifiWebServer example sketch via the Arduino IDE onto the ESP8266:
http://www.whatimade.today/esp8266-easiest-way-to-program-so-far/
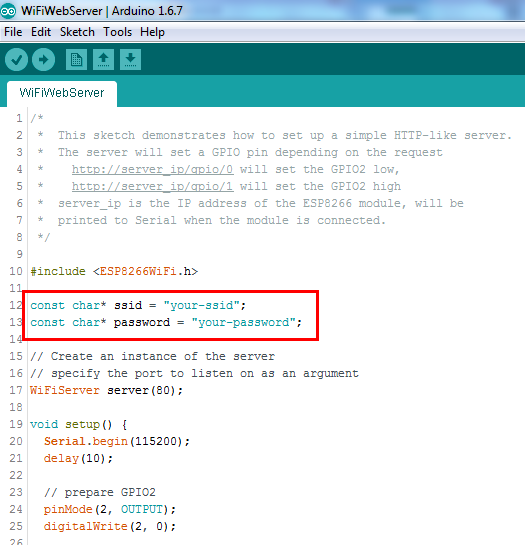
Then load the sketch in the Arduino IDE under File -> Examples -> ESP8266Wifi -> WifiWebServer

Then change the two places in the code where it says “your-ssid” to your wifi ssid on your network and “your-password” to the wifi password for your network.

Then do a File – Save As and save it somewhere you’ll remember and call it something else like WifiSmartSwitch.
Then follow those directions above to load that sketch onto your ESP8266 module with your wifi settings saved.
Now you should be able to open the serial monitor in the Arduino IDE and see the message that shows the ESP8266’s IP address. Then type that IP address into your browser followed by /gpio/0 or /gpio/1 to turn GPIO2 pin off or on. You should see the message in your browser like “GPIO is now” LOW or HIGH. If you don’t see that message then you might have missed a step above.
Now the fun part: You have to load a python script onto some other computer on your network that stays on all the time like a Raspberry Pi. You can get the python script from github here: https://github.com/makermusings/fauxmo
You’ll want to download that Fauxmo.py file (I just hit the Download Zip button there on github to grab all the files) and edit it with notepad or your favorite text editor. Scroll down or find the line with the two fake wemo switches:
FAUXMOS = [
 ['office lights', rest_api_handler('http://192.168.5.4/ha-api?cmd=on&a=office', 'http://192.168.5.4/ha-api?cmd=off&a=office')],
 ['kitchen lights', rest_api_handler('http://192.168.5.4/ha-api?cmd=on&a=kitchen', 'http://192.168.5.4/ha-api?cmd=off&a=kitchen')],
]
And change it to something like this:
 FAUXMOS = [
 ['living room lamp', rest_api_handler('http://192.168.0.107/gpio/1', 'http://192.168.0.107/gpio/0')]
]
Then save it and put that python file on your Raspberry Pi or other computer and run it. It should run and wait for requests forever. You may want to rig up a script or other way to get it to run that python file automatically whenever the computer starts.
Then set the jumpers on your breadboard power supply so that OUT1 is 5V and OUT2 is 3.3V. Then wire up some female jumpers from 5V to the VCC of your relay switch, GND to relay GND, and the IN or TRIGGER pin of your relay to the GPIO2 pin of the ESP8266. Then connect 3.3V to ESP8266 VCC and CH_PD, GND on power supply to ESP8266 GND. Then power up your power supply with a USB cell phone charger and your USB mini cable. You should see it power up a bunch of LEDs. And if you type in that IPADDRESS/gpio/1 in your browser like you did earlier then you should see the relay switch click on – and off with /gpio/0. If not, then you may need to log into your wireless router and figure out the IP address of the module from the list of DHCP clients.
Then you should be able to use an Amazon Echo to search for devices and then tell it to turn your “living room lamp” on or off!
Here’s some more photos and video showing it working. It looks like my relay is about to give up the ghost so I’ll be replacing that right now!
https://goo.gl/photos/6oSeY1CSgueX3tGK8