So my neighbor and I have a fence between us that we can’t see through. Their dogs fight with our dogs through the tiny slits in the wooden fence boards and cause a real ruckus that surely wakes up any sleeping neighbors. So we tried to think of various ways to let each other know when the dogs are outside:
- Send text messages back and forth: My dogs are out. My dogs are in. Over and over as needed.
- Raise a flag on a little homemade flag pole and lower it when we bring the dogs inside.
- Use RFID tracking collars to determine dog distance and location from inside the home vs outside.
- Use cameras pointing down at our back porches and use computer vision and machine learning to determine if the dogs are going in or out.
- Use wireless modules with a single button and two LEDs labeled “My dogs are out” and “their dogs are out.” Smash the button when you let them out and smash again when you bring them in.
Since my friend sent me a few wireless modules from Synapse Wireless in Huntsville Alabama, and I have access to a great makerspace here in Melbourne, I decided to go down the path of #5.

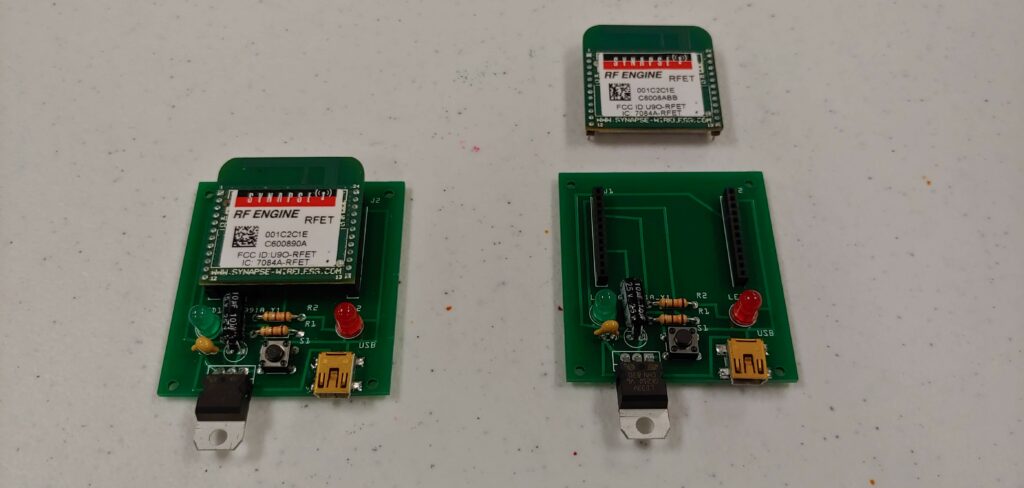
I first created a prototype using the testing board from Synapse that let me quickly attach two LEDs and a push button momentary switch to the wireless module. I could then write the code to make it work using their special Python language called SNAPPy. I wrote a simple script that would watch for the button to be pressed then it would light up the first LED and send a wireless signal to the other modules to light up its other LED. Then if the same module pressed the button as before, it would turn all the LEDs off and wirelessly tell the other one to do the same. Once my prototype was tested on that test board I was ready to create a custom, smaller, very specific circuit board for me and my neighbor to hang on the wall inside our back doors.

I used a free, open source program called Fritzing to design the custom circuit board that will provide power to the wireless module and LEDs via a USB wall plug. Then I ordered the parts like LEDs, resistors, capacitors, voltage regulators, and USB connectors from Sparkfun. I used JLCPCB to manufacture the custom boards I created in Fritzing and exported the Gerber files to upload to JLCPCB’s website. From the time I ordered the boards to getting them in the mail from DHL was 6 days from China! It took them less than 24 hours to make and ship them. I will be using them for all future custom circuit boards.


Since the Melbourne Makerspace has such a great electronics workbench with all the tools I needed like soldering irons, clamps, and testing equipment I was able to put it all together. Another great thing about the makerspace are the other members with the electronics skills to help a software engineer like me understand what parts should go where and what size resistors to use and will it blow up if I connect this wire to this wire. I was able to test my finished product with my prototype to make sure it worked and it did.


Now my next step is to design a 3D printed box around it that can hang on the wall near our back doors. Then when we need to let the dogs out we can see if the LEDs are off and if so, smash the button. It will light up the “My dogs are out” LED on that box and wirelessly turn on the “Their dogs are out” LED on the neighbor’s box. Then when you bring your dogs back inside, smash the button a second time and it will turn off all the LEDs on both modules wirelessly.

